| Attendance Sheet |
Last Updated: Aug 30, 2013 01:17PM EDT
The generate feature is used to re-evaluate all of the data on the software according to any changes that have been made in the System Settings. If you have made a change on the clocking schedule and you would like this change to apply to a specific day or dates, you will have to generate the Attendance sheet.
It is recommended that you create a backup of your database before generating the attendance sheet, so that you can recover all of the data that you had before making any changes.
For more information on how to backup your database, please Click Here.
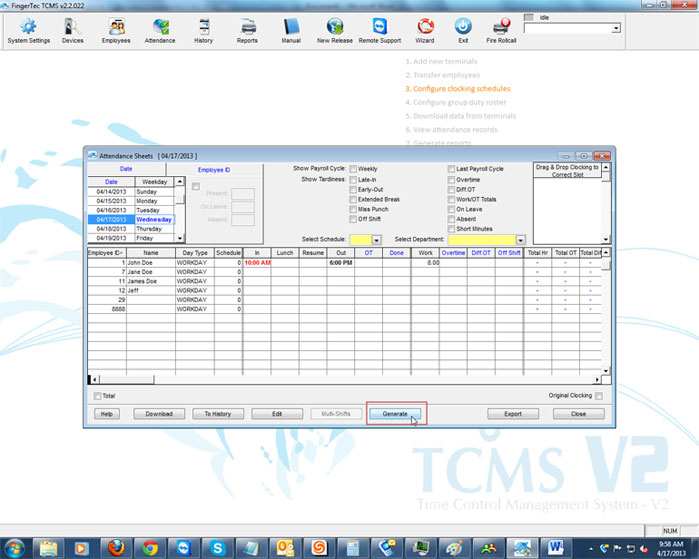
To generate the Attendance sheet, you will need to click on the Attendance icon on the TCMS software.
When the Attendance sheet opens, you will need to click on Generate.
Afterwards, you will have to select the employee(s) that you want the change to apply to, and then you will have to select the dates that you want to generate for the employee(s). You also have the option of using the "Department" filter so that you can apply the changes to just certain employees that are in that department.
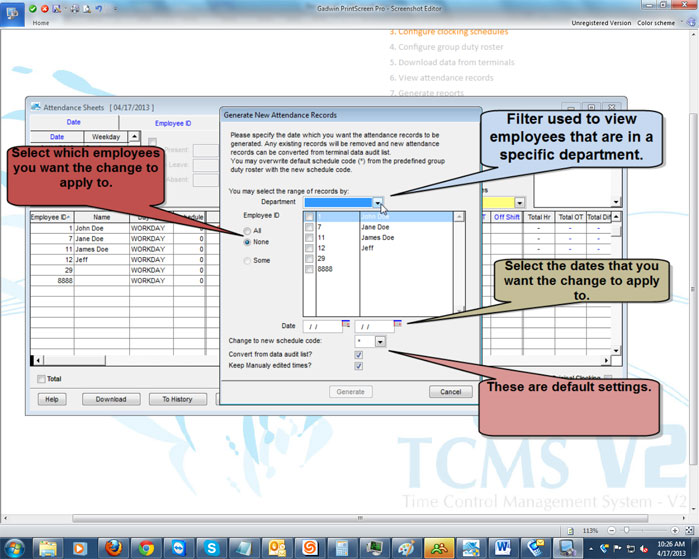
After selecting the dates, you will see a drop down list next to "Change to new schedule code", and you will also see two check boxes next to "Convert data from audit list" and "Keep manually edited times?" The "Change to new schedule code" will allow you to change the schedule that all employees are on. The "Convert data from audit list" will take the exact data that is on the audit list, and reapply it after clicking on "Generate". The "Keep manually edited times?" will allow you to keep any data that is manually entered in the attendance sheet.
It is recommended that you keep the default settings.
Afterwards, you will have to click on Generate to apply the changes.
Once you click on "Generate", you will get a pop up on your screen. The pop will recommend that you create a backup of your database before applying any changes. Once you create the backup of your database, you will just have to click on "Okay" when you see the pop up. After clicking on "Okay", all of the data will be generated.

